pipenv 是目前 Python 官方推薦的套件管理系統,在一段時間以前,好啦其實就是現在(? 還有很多人使用 pip 和 virtualenv 來進行 python 開發,這樣當然沒問題,只是維護 requirements.txt 有些麻煩,pipenv 則是整合兩者的一個工具,挺好用的介紹給大家。
在 Windows 上安裝 pipenv 十分簡單,只需用 pip 安裝即可:
|
|
如何創建一個 Project:
|
|
安裝完成的提示:

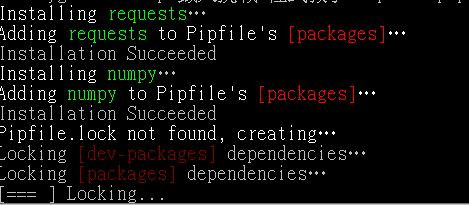
套件安裝,示範安裝 request 和 numpy:
|
|
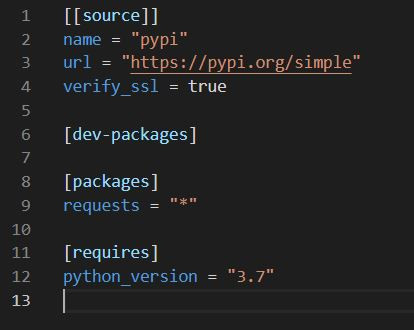
第一次執行 pipenv 後會在目錄下產生 Pipfile 裡面會記載安裝過的套件,就像我們以前用的 requirements.txt 一樣,同時也會在安裝好後新增 Pipfile.lock 作為 Hash 的安全檢查用。


若在安裝後加上 --dev 參數則會安裝開發階段的套件,不會影響到穩定版,例如
|
|
解除安裝也很簡單
|
|
進入虛擬環境的方法,不用像以前還要打一串 Script/activate 等等的東西,直接下 shell 就行啦~
|
|
cmd 會出現
|
|
表示成功進入虛擬環境了。
產生舊版 requirements.txt 指令
|
|
列出套件相依圖
|
|
大概就是這些常用指令啦,大家未來在開發 Python 時一定會用到很多第三方函式庫,有了 pipenv 就可以事半功倍啦~
參考資料
https://github.com/pypa/pipenv
https://medium.com/@chihsuan/pipenv-%E6%9B%B4%E7%B0%A1%E5%96%AE-%E6%9B%B4%E5%BF%AB%E9%80%9F%E7%9A%84-python-%E5%A5%97%E4%BB%B6%E7%AE%A1%E7%90%86%E5%B7%A5%E5%85%B7-135a47e504f4
同步刊載:https://ithelp.ithome.com.tw/articles/10220927